
Welcome back to Flow Documentation Month here at The Flow Architect. This is a five week series here on this blog covering a variety of topics around the subject of Flow Documentantion. We kicked off last week with our into post to the series, Tips on Creating Helpful Documentation. This week we’ll look at what you can inside Salesforce to help with your documentation efforts. Once again, my aim with this series is to help Salesforce Admins out there who are struggling with Flow Documentation to really begin to get to grips with it. Flow Documentation isn’t the easiest thing in the world to do, but hopefully this brief blog series will help you start to figure it out, to see what works best for your and to maybe even begin implementing some of the things covered in this series in the work you do as an #AwesomeAdmin. Like last week, this post will be a little bit on the brief side, as we’re really just covering what you can do inside of Salesforce to help you with your Flow Documentation efforts. To peel back the curtain a little bit, I actually wrote this in the early hours of the morning in San Francisco while being in town to attend TrailblazerDX (thank you jetlag for making me wake up early in the morning). But back to the topic at hand, this post in Flow Documentation Month.
This post will focus on the four main things you can do inside Salesforce to help you with your Flow Documentation efforts. Please do note that one of the topics directly relates to the topic for the fourth post in this series, that being the post on the topic of Naming Conventions in Flow Builder. So please know that the point on Naming Conventions in this post will be very brief, we will not go into depth on Naming Conventions, as I don’t want to take away from the material for that upcoming post in the series.
So before we dive in, let me tell what each of the four talking points in this post are going to be:
- Populate Description Fields in Salesforce Flow
- Add In-Line Comments to Provide Important Information
- Decide Upon a Naming Convention for API Names
- Create Custom List Views to Help Organise Your Flows
N.B. You can also create reports for Screen Flows and Orchestrator. These reports show which of these Flows have been run in your org, and what Orchestration Work Items have been carried out. I won’t be covering that in this blog, but these can be used for documentation as the reports do house information that you may find relevant to your Flow Documentation efforts, while not being documentation itself.
Let’s dive in!!!
#1: Populate Description Fields in Salesforce Flow
We kick off with one of argubaly the most important things any Salesforce Administrator can do across the orgs they maintain. That being populating description fields. This point doesn’t need too much in the way of explanation, but when it comes to Flows specifically, description fields are so important. Description fields allow you to document the item in question, for example in a Flow let’s say that we add a description to a description field for a Screen Element. In that description field we will be able to explain the purpose of that element, and thus provide a bit of insight to the Salesforce professional who will be responsible for maintaining that Flow in the future. In Flow we can actually see the descriptions within the underlying code that is created as we build out our Flows in our Flow canvas. So for example if we need a developer to look at something relating to our Flow, they can review the metadata associated with the Flow and read the descriptions fields in our Flows. This is something very beneficial as description fields can be deployed into production orgs via change sets or using deployment tools such as Gearset and Copado.

Code snippet example showing value of a Description Field.

Example Description Bubble shown in the Flow Canvas.
On top of the ability to view the values within a description field via the Flows metadata, the Spring ’23 release brought us the addition of seeing field descriptions inside what we call Description Bubbles. In layman’s terms, now when an Admin populates a description field inside a Flow in Salesforce, an icon will appear to the right of the element’s label, when you hover this icon the value you added to the description field will be shown. This addition to Flow Builder is a great one!!! Now users can easily see and understand what a Flow element was built to do within the context of that Flow.
While it is most certainly best practice to add values to description fields across your Salesforce org. In Flow, the added benefit here is that we can extract this information from Salesforce relatively easily and add this to our core Flow Documentation. So it would be a recommendation of mine to populate description fields in your Flows … granted I know that it is sometimes easier to not do that (particularly for demos and presentations), however, when it comes to Flows used in production, please add them!!!
Your users and future Admins will thank you for it … I can guarantee that one.
#2: Add In-Line Comments to Provide Important Information
Next up on my list is the ability to add in-line comments inside Flow to really help provide critcal information. Like with the previous point, this isn’t unique to Flow, as you can add in-line comments to formulas and validation rules inside of the object manager in Salesforce. You can also add in-line comments to Apex and LWCs as well, but I am not expert on those things in all honesty. In-line comments is traditionally a coding concept, as coders use these to add information to other coders that they don’t want to either be visible outside of the code, or to do anything other than provide information. Going back to my late teens, I started my usage of in-line comments with comments in HTML, I later started implementing in-line comments in CSS as well. So interestingly enough, I actually learnt about adding in-line comments to code a lot earlier than I started working within the Salesforce ecosystem. I do want to show you in this post how you can add in-line comments with a lot of ease in the Flows that you build within Salesforce.
You can add in-line comments to three main places inside your Flows in Salesforce:
- Formulas
- Validation Rules
- Text Templates
N.B. The approach to writing in-line comments do differ between Formulas/Validation Rules and Text Templates.
Let’s now show you how adding in-line comments inside of Flow works at a very practical level. Don’t worry, it’s not hard at all!
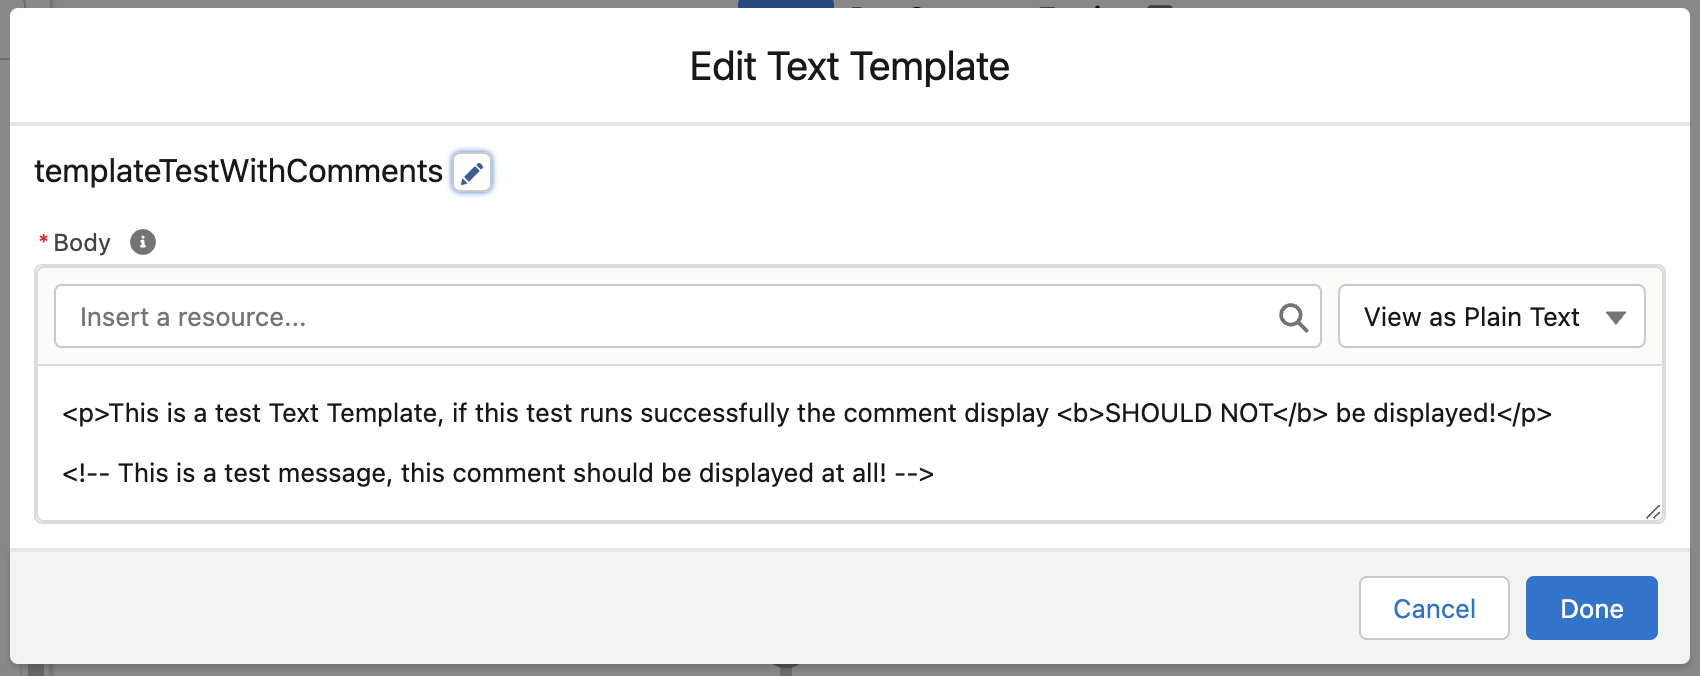
First, let’s talk about how to add in-line comments to items with Rich Text (HTML) in Flow. This will mainly apply to Text Templates in the Flows that you build. But if you have other items that allow for the usage of HTML formatted Rich Text, this approach to adding in-line comments should work there as well. Adding in-line comments to HTML is really simple.
All you need to do is to wrap your comment up with an openeing tag of <!– and a closing tag of –>. Adding these tags will allow you to add information to that item in your Flow. Any in-line comments you add to your Flow should only be visible within the Flow canvas and your Flow’s metadata.
Below is an example of what your HTML should look like when you include an in-line comment in your code … please note that I have copied the same code as shown in the image.
This is a test Text Template, if this test runs successfully the comment display SHOULD NOT be displayed!
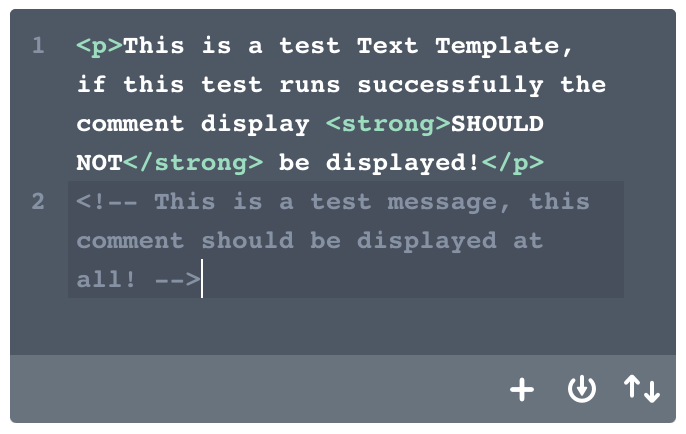
The code of the HTML shown for reference … please note that you can include either <b> or <strong> in your Rich Text inside of Flow. I opted to use strong because WordPress prefers the <strong> tag inside code snippet elements in this template.
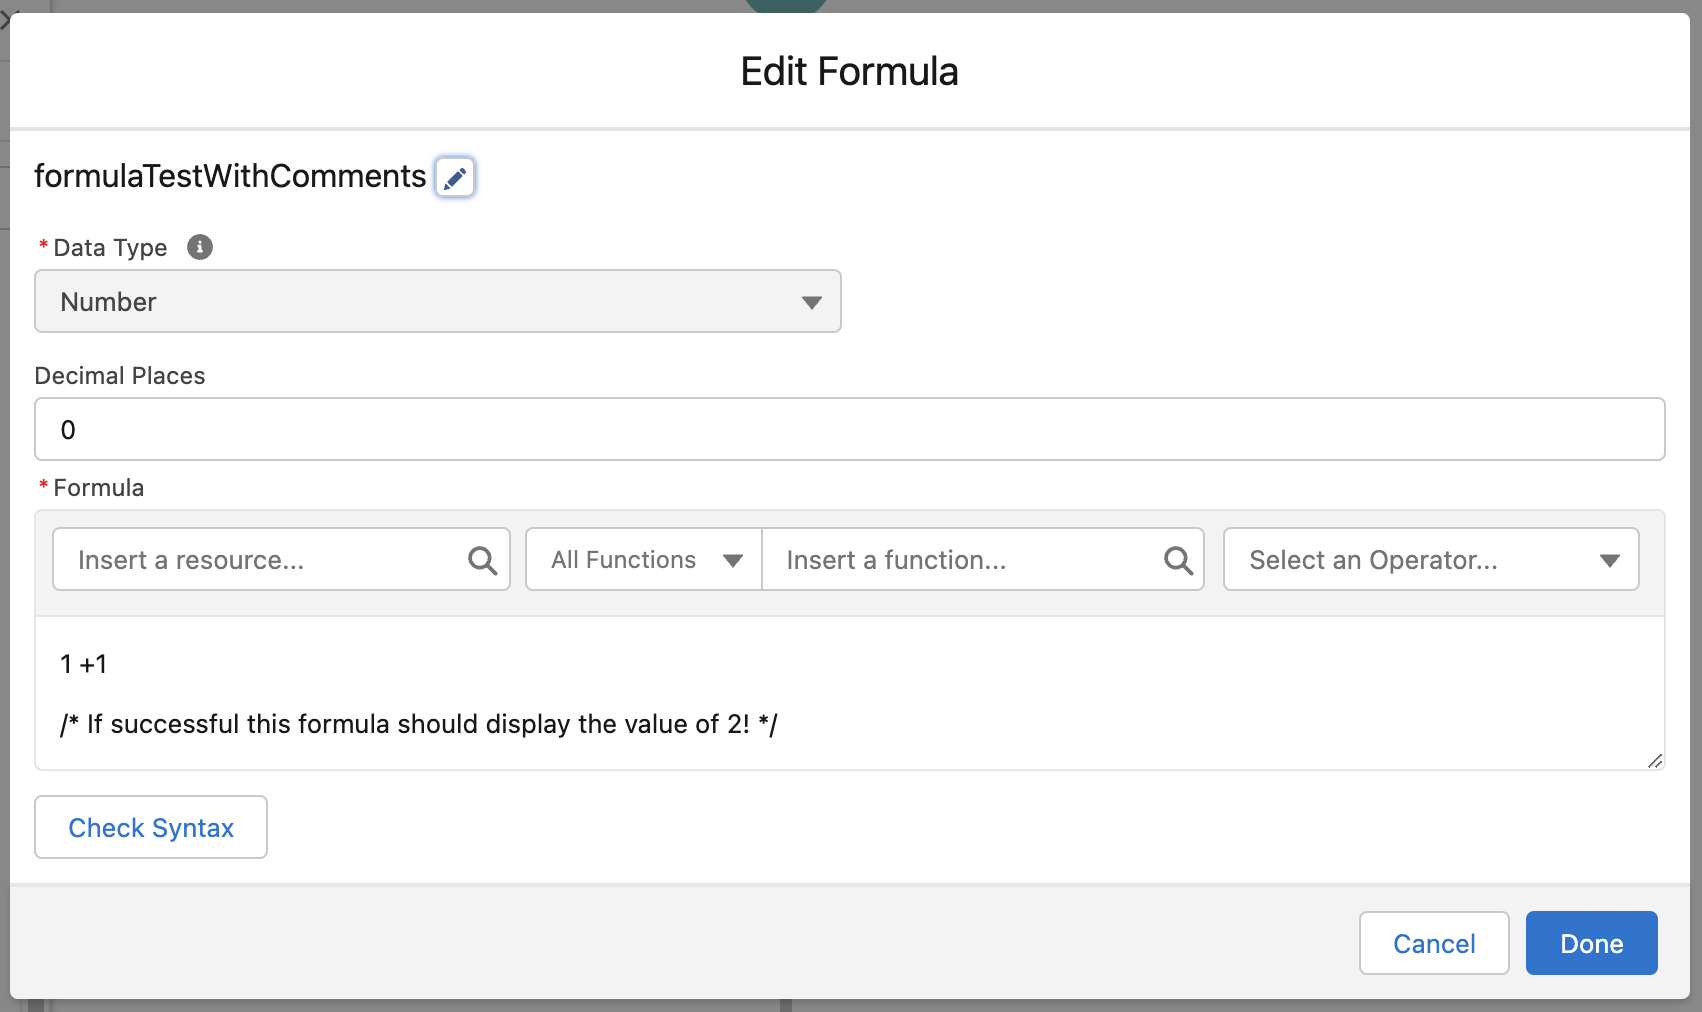
Secondly, let’s look at in-line comments for formulas and validation rules. Writing these follow the same conventions as you would when writing in-line comments in CSS code. CSS is the styling code that you write to traditionally add styling to websites built using HTML code. Here the person writing the comment would open the comment with the tag of /* and the closing tag of */ … the inclusion of these tags inside of either a formula or a validation rule will allow the Admin to provide some information about whatever that formula or validation is meant to do when calculated successfully without that said instruction actually being a part of the calculation in question.

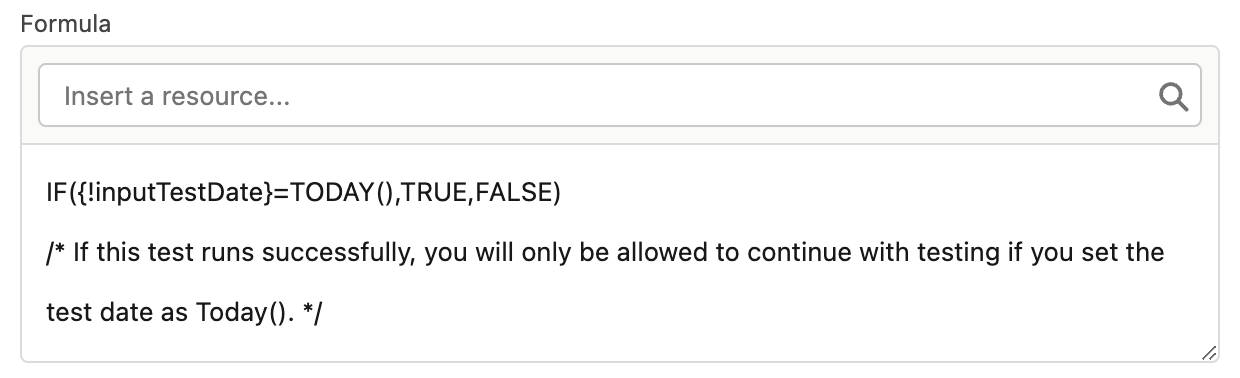
In the examples I have shown above, I have included some basic guidance on what each of the formulas should do when calculated successfully. This would be my advice for how to use in-line comments inside your Flows. Use them to note anything specific that should be known about that set item.
I don’t think in-line comments have to be anything hugely complex. They are best used to provide critical information to the Admin who will be responsible for the continuing maintenance and enhancement of the Flow that the in-line comments are attached to.
#3: Decide Upon a Naming Convention for API Names
Our penultimate point for this post is a crucial one. Here I am referring to the need to decide upon a naming convention for API names inside of Flow Builder. Now, as I stated before, we won’t be diving too deeply into naming conventions in this post, as I have post specifically about that topic coming in week 4 of this series. So for now, I’ll speak less about the point on a technical level.
I will however, talk about it from a principle level. In terms of structure and organisation, naming conventions are very important. Having an agreed upon naming convention will allow you to do things such as organising your resources and variables in a much cleaner and easy to understand format. Ways to do this well (in my view) will be something I cover more deeply in week 4 of this series. What I will say for now is that naming conventions are less about the naming pattern in Salesforce (although that’s worth having a think about) and more about the conventions you use to organise your variables and resources in your Flow’s toolbox.

Take the example shown with the toolbox for the Flow I’ve been using in this post to show the examples used for this blog post. Here you can see that all of the resources in this Flow are grouped in a logical manner, one that should hopefully be easy to understand without much translation.
N.B. The Flow used in this post was a Screen Flow, so please do note that some of my naming conventions differ between Screen Flows and other Flow types.
In this Flow you will be able to see four main prefixes. Those prefixes being display, input, template and email. The logic behind this is actually quite simple. In a Screen Flow I use the prefix of display to refer to Display Text components, input for Input Components, template for Text Templates and email for Email Actions. I’ll go more in-depth with my chosen prefixes in week 4 as well. But the main principle I use is to try and make my API name prefixes easy to understand. For example, in the case of my input prefix, this highlights that the user running the Flow will have to input data in that particular component, I tend not to specify the field type in the API name as the logo in the canvas is sufficient enough in my view. Once again, I aim to use the principle of simplicity to explain complexity.
The over-arching principle around naming conventions in my view is two-fold. First, is it understandable? Meaning that if someone else took on the job of maintaining the Flow that you build, could they understand what the API name is referring to without the need to dig too into your Flow or send you messages or emails to ask for an explanation. Secondally, try and be consistent with the format you choose to use. Now this doesn’t mean you can’t change things over time, the point here is to avoid changing naming conventions across each Flow you build, to avoid mixing naming conventions in the same Flow and to encourage other Admins in your company who build out Flows to use the same naming convention. Once again, I’ll speak about this more in week 4’s post.
#4: Create Custom List Views to Help Organise Your Flows
And finally, our last point for this particular post. Here I am referring to the ability we have to create List Views for our Flows in our Salesforce orgs. Once again, this point isn’t exactly a complex one, but inside of setup in Salesforce we can create list views for Flows. Like with the previous point, this point also mainly revolves around organising your Flows and create groupings of Flows. Say for example that you want a list of all of your Screen Flows in an easily accessible place, well in Flows inside of setup you can create a list view and filter it down to only display Flows where the Process Type equals Screen Flow. This will give you that list.
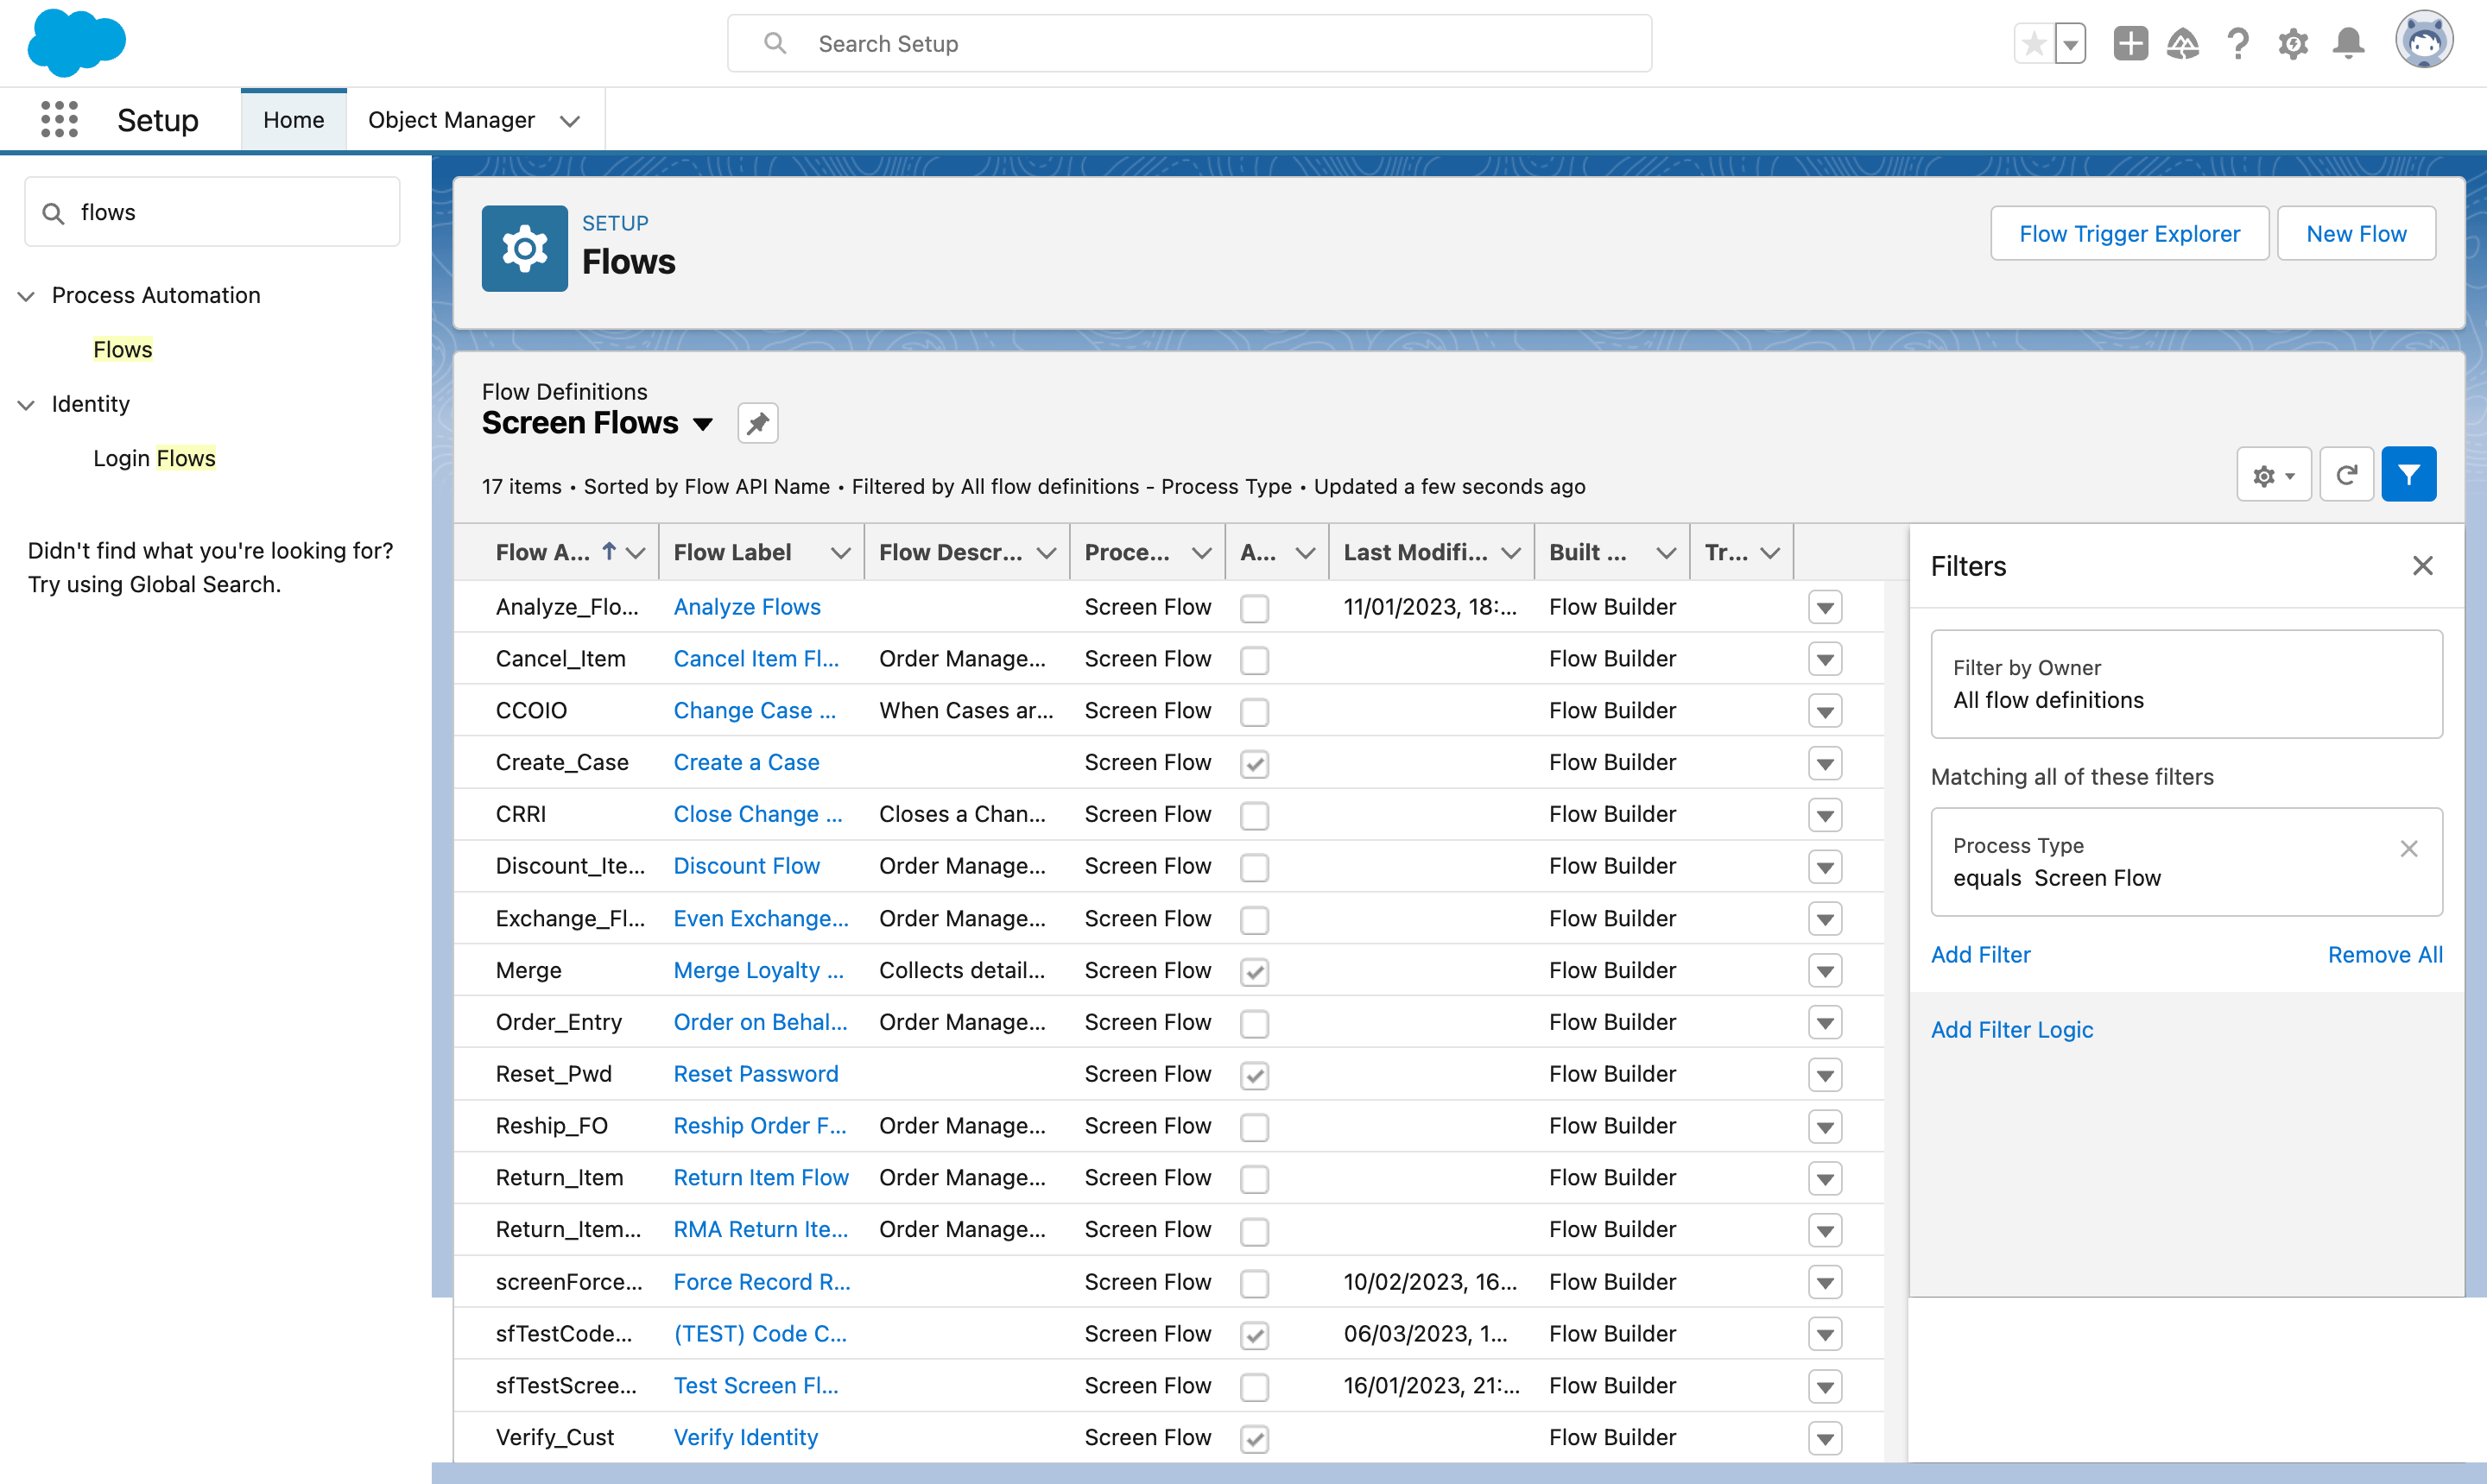
A list view for Screen Flows, filtered by the Process Type of Screen Flow.
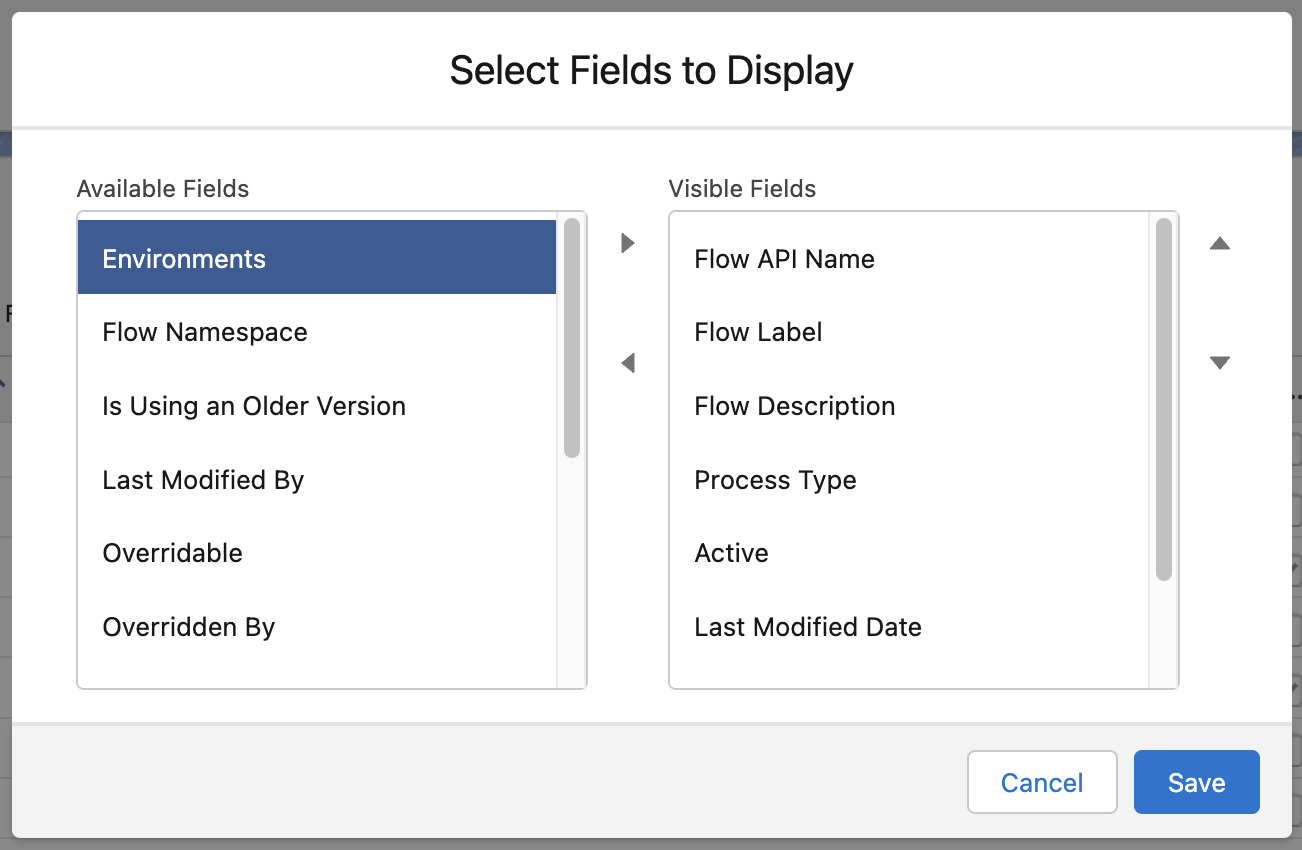
In List Views for Flows, you can easily select which Fields you want displayed.
Like in traditional list views, you can select which fields you want to be displayed, and which filters you want to be included in your list. I’ve cited an example above for that on Screen Flows. But you can use it for other Flow Types such as Record-Triggered Flows, Schedule-Triggered Flows and Orchestrations.
N.B. To make the list filter for Record-Triggered you will need to set the filters to be as below:
Process Type = Autolaunched Flows AND Trigger = Record-Run Before Save, Record-Run Before Delete, Record-Run After Save
If you actually get creative with it, you could actually also build a Screen Flow with an UnofficialSF DataTable and combine that with the Convert Records to CSV File action (also available from UnofficialSF) to generate a list of all of your Flows in an easy-to-use CSV file.
N.B. Check out my example here.
So not only can you create list views in your org for Flows, you can also create a Screen Flow where you can export all of the relevant info you need on your Flows to be used in other external documentation that you create in relation to the Flows that you build as a Salesforce Administrator. Pretty handy right?
Closing Comments
So that’s what you can do inside of Salesforce in order to help you document your Flows. I think there is some pretty great things that you can do to help you get started with documenting your Flows inside of Salesforce. Have you done any of these things in your documentation efforts relating to Flows? If so, how did you get on? Are there any other things you are aware of that you can do inside Salesforce to document your Flows? If you have used other methods to document your Flows in Salesforce I’d love to hear about them in the comments below. I’ll be back next week with week 3 of this series. In next week’s post we’ll be looking at the Flow Documents I think you need most in your life … I will have examples of those documents as well that I can share. Until then, I’d love to hear your comments and thoughts on this topic in the comments here, or on social media via LinkedIn or Twitter.


